Dreadlord Catacombs Dungeon
Table of Contents
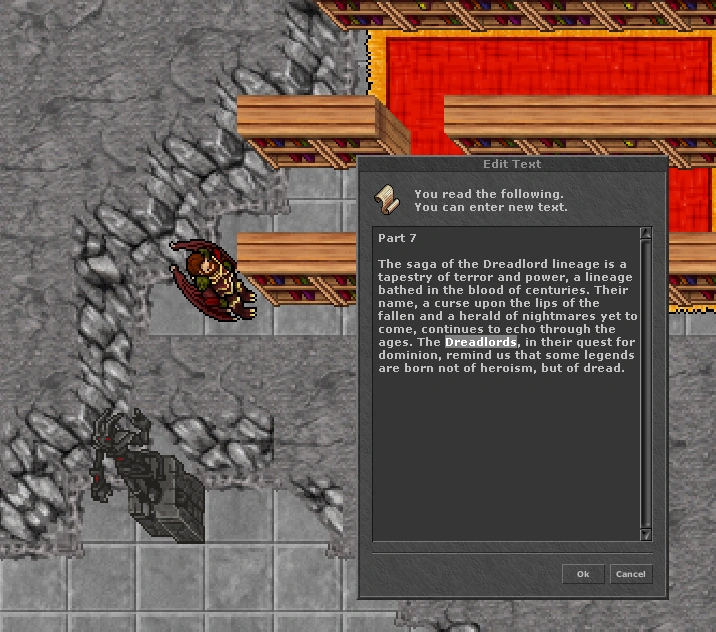
Dreadlord Catacombs Dungeon - Overview
Rozbudowany dungeon z 5 etapami, wieloma zagadkami i finalnym bossem. Po drodze walczysz miedzy innymi z Sovereign of Shadows, Guardian of the Abyss i Zarath the Corruptor.
A long 5-stage dungeon with multiple riddles and a final boss. Along the route you fight Sovereign of Shadows, Guardian of the Abyss, and Zarath the Corruptor.
Glowny cel: przejsc wszystkie etapy i pokonac The Dreadlord Himself, aby odebrac wybrana nagrode.
Main goal: clear all stages and defeat The Dreadlord Himself to claim your selected reward.
Requirements
- Team: 5 osob (lever room).
- Team: 5 players (lever room).
- Boss progress: 11 final boss progress/reward unlock.
- Boss progress: 11 final boss progress/reward unlock.
 Przedmioty: min. 3x Vial of Oil.
- Items: at least 3x Vial of Oil.
 Narzedzie: zwykly Pick (potrzebny przy krysztale).
- Tool: regular Pick (required for crystal step).
 Rings: Might Rings sa mocno rekomendowane.
- Rings: Might Rings are strongly recommended.
- Gear: minimum tier 2 eq.
- Gear: at least tier 2 equipment.
 Waluta wejscia: Golden Sun Coin albo Dreadlife Charm.
- Entry currency: Golden Sun Coin or Dreadlife Charm.
Dungeon Entrance
Soulwar Hub
Soulwar Hub
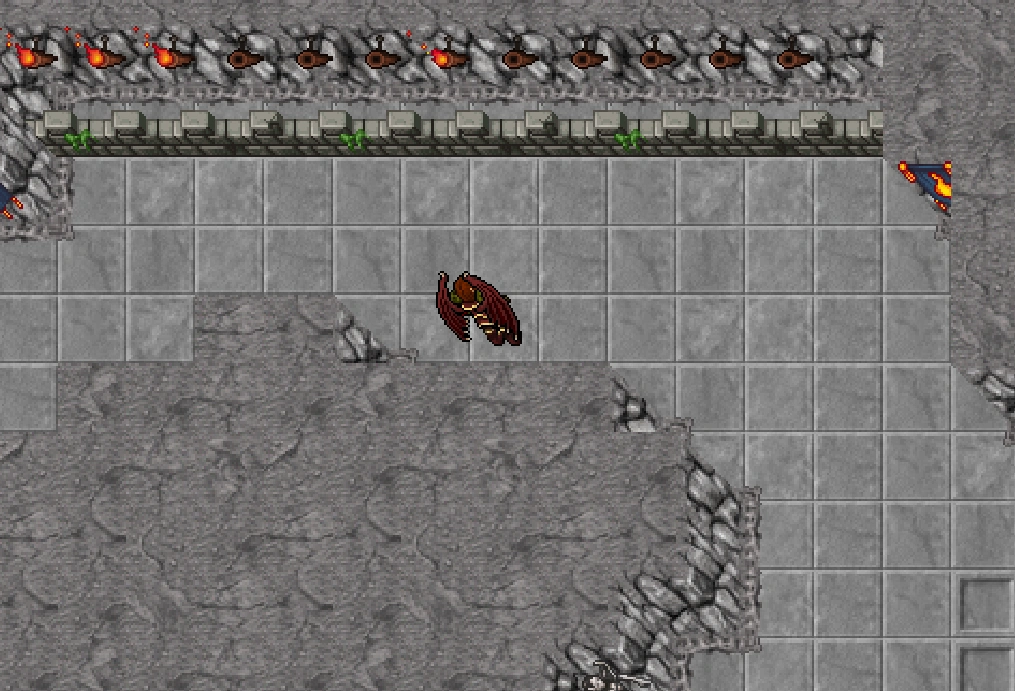
Przejdz przez energy wall i dotrzyj do Azaros The Gatekeeper.
Go through the energy wall and reach Azaros The Gatekeeper.
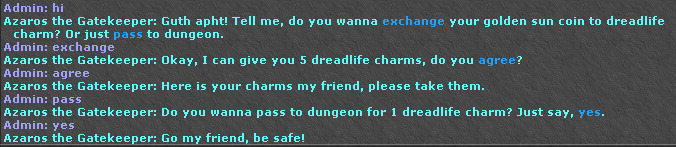
Rozmowa z Azaros
Talk to Azaros
NPC przepuszcza dalej i obsluguje wymiane Golden Sun Coin na Dreadlife Charm.
The NPC lets you pass and handles Golden Sun Coin to Dreadlife Charm exchange.
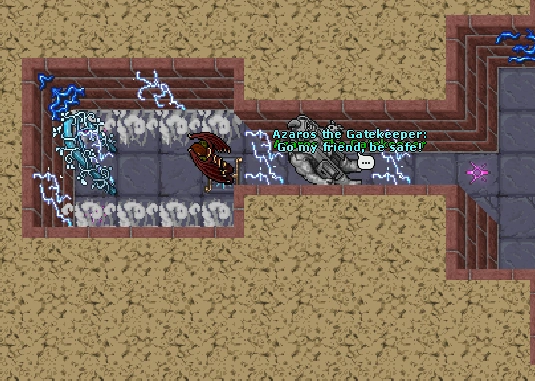
Teleport i lever room
Teleport and lever room
Po przejsciu trafiasz do teleportu i pokoju z dzwignia dla 5 osob.
After passing through, you enter teleport and lever room for 5 players.
Choose Guaranteed Reward at Start
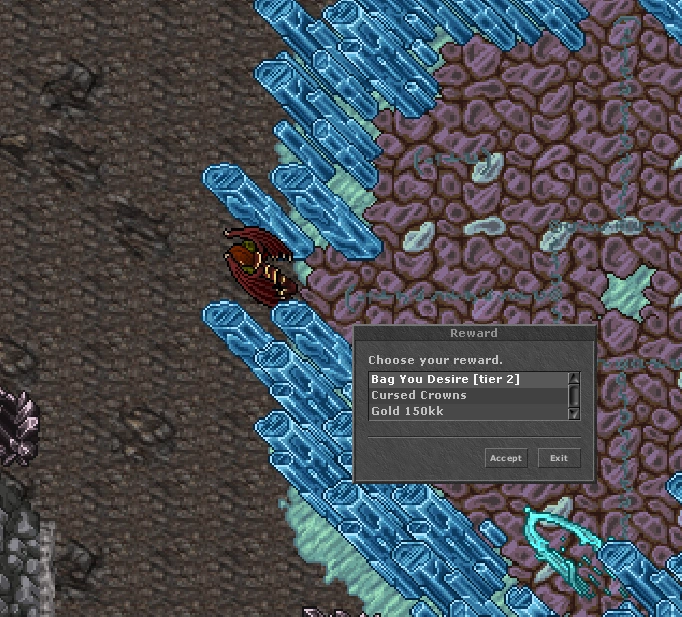
Zaraz po wejsciu do strefy dungeonu wybierasz jedna z 3 gwarantowanych nagrod. Dwie sa jednorazowe, a Cursed Crowns mozna farmic przy kolejnych przejsciach.
Right after entering the dungeon area, choose one of 3 guaranteed rewards. Two are one-time only, while Cursed Crowns can be collected on repeated clears.
- Bag You Desire [Tier 2] - nagroda jednorazowa.
- Bag You Desire [Tier 2] - one-time reward.
- 150,000,000 gold - nagroda jednorazowa.
- 150,000,000 gold - one-time reward.
- Cursed Crowns - mozliwe do odbierania przy kolejnych clearach.
- Cursed Crowns - can be claimed on repeat clears.
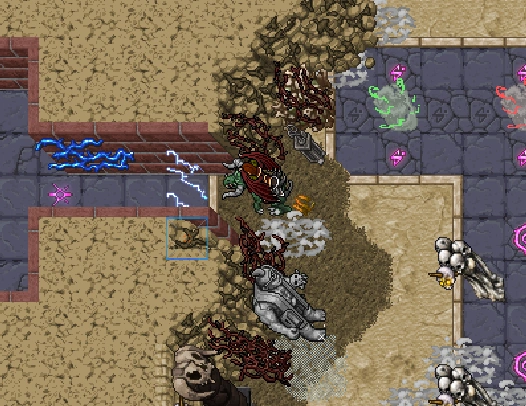
Stages 1-5 and Riddles
Stage 1
- Brak powrotu - po wejsciu w strefe etap jest jednokierunkowy.
- No return path - once inside, progression is one-way.
- Zabij 50 potworow (Dreadlord Imperator / Dreadlord Supreme), aby odblokowac bossa.
- Kill 50 monsters (Dreadlord Imperator / Dreadlord Supreme) to unlock the boss.
- Boss: Sovereign of Shadows.
- Boss: Sovereign of Shadows.
- Po bossie rozwiazujesz 1 zagadke: uklad podlogi w ksztalcie litery D.
- After the boss, solve riddle 1: floor pattern shaped as letter D.
Stage 2
- Najkrotszy etap.
- Shortest stage.
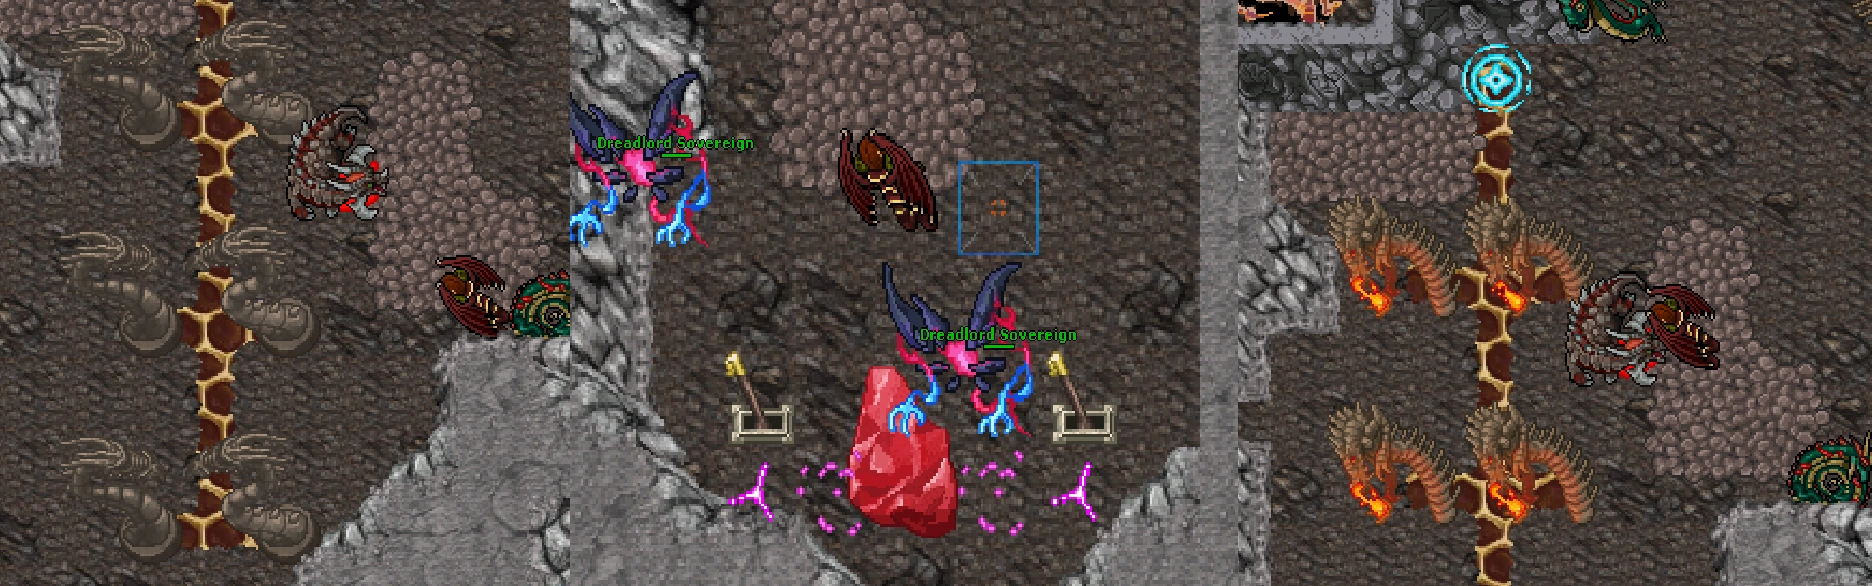
- Zabij 90 potworow po drodze (w tym Dreadlord Sovereign).
- Kill 90 monsters on route (including Dreadlord Sovereign).
- Boss: Guardian of the Abyss.
- Boss: Guardian of the Abyss.
Stage 3
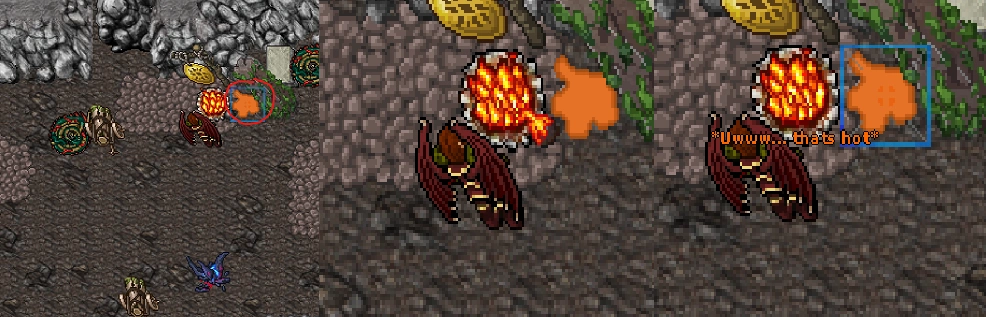
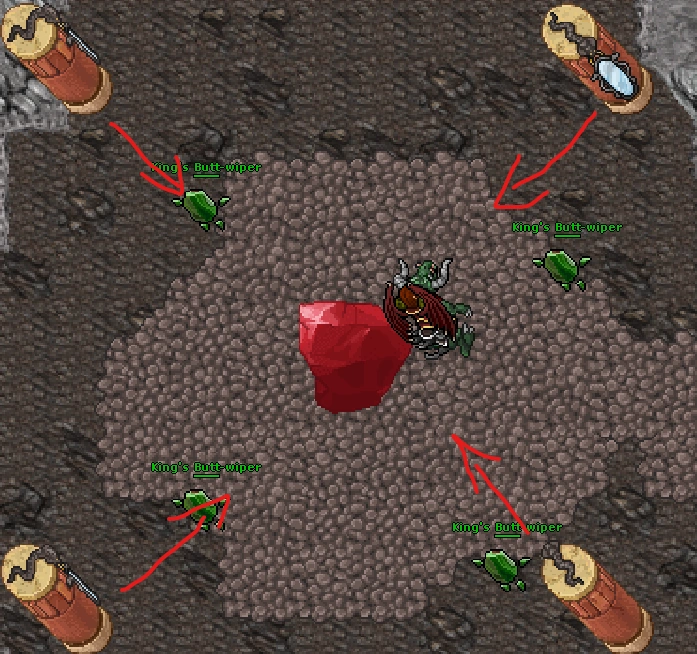
- Riddle 2: armaty i kule nasaczane olejem. Potrzebny Vial of Oil.
- Riddle 2: cannons and oil-soaked balls. Requires Vial of Oil.
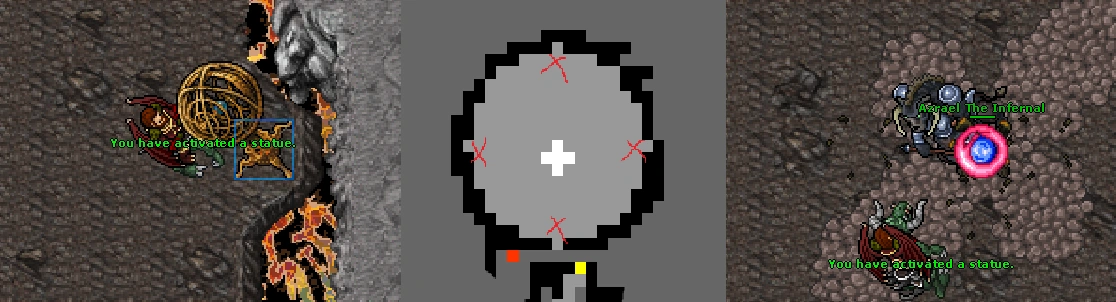
- Riddle 3: ustawienie smokow twarza do siebie + dzwignie.
- Riddle 3: align dragon statues facing each other + pull levers.
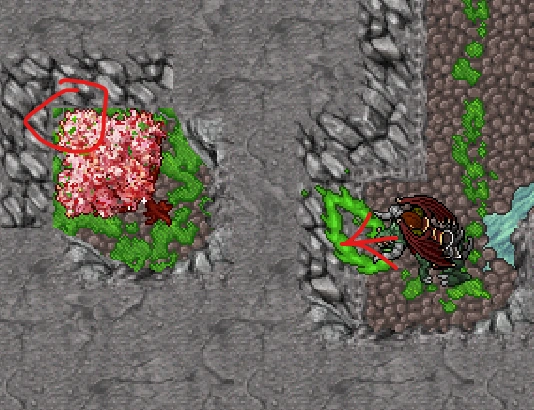
- Riddle 4: uzupelnianie viali i podlewanie martwych drzew do zielonego stanu.
- Riddle 4: refill vials and water dead trees until all are green.
- Riddle 5: Green Path of Destiny - przejscie po poprawnej sciezce.
- Riddle 5: Green Path of Destiny - follow the correct green route.
- Riddle 6: ukryty portal i losowe magiczne sciany na ciemnej sciezce.
- Riddle 6: hidden portal and random magic walls on dark path.
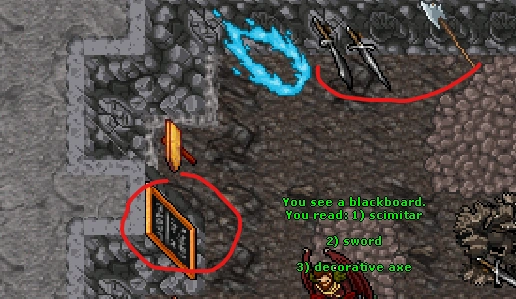
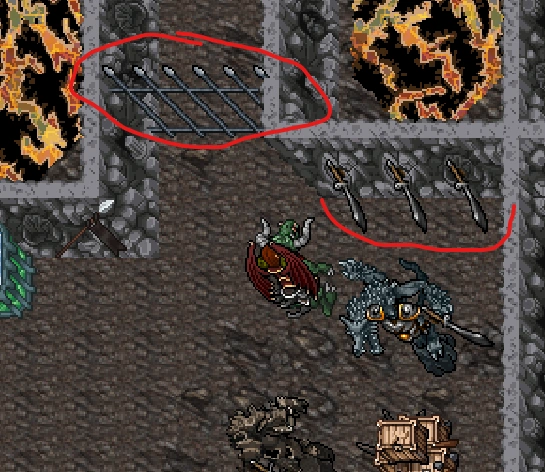
- Riddle 7: poprawna kolejnosc broni + aktywacja apparatus do bossa.
- Riddle 7: correct weapon order + apparatus activation for boss.
- Boss etapu: Zarath the Corruptor.
- Stage boss: Zarath the Corruptor.


Stage 4
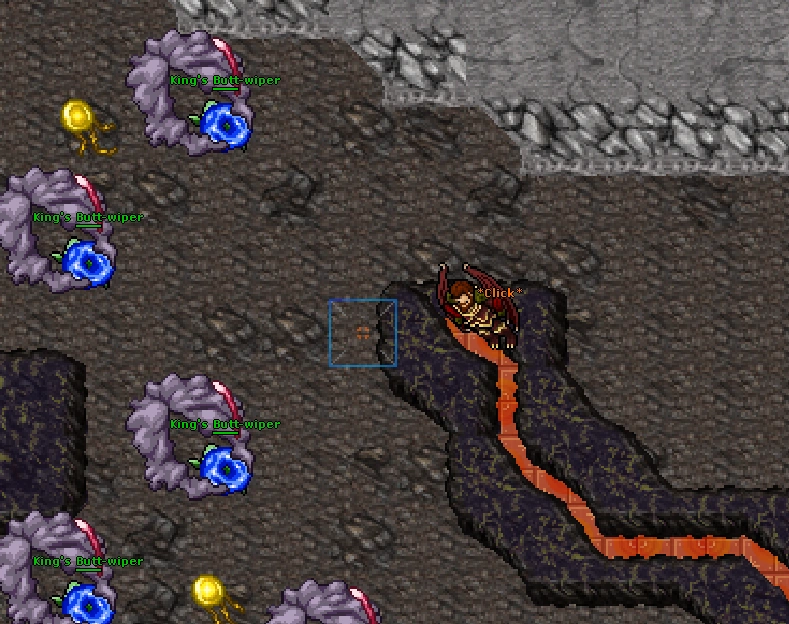
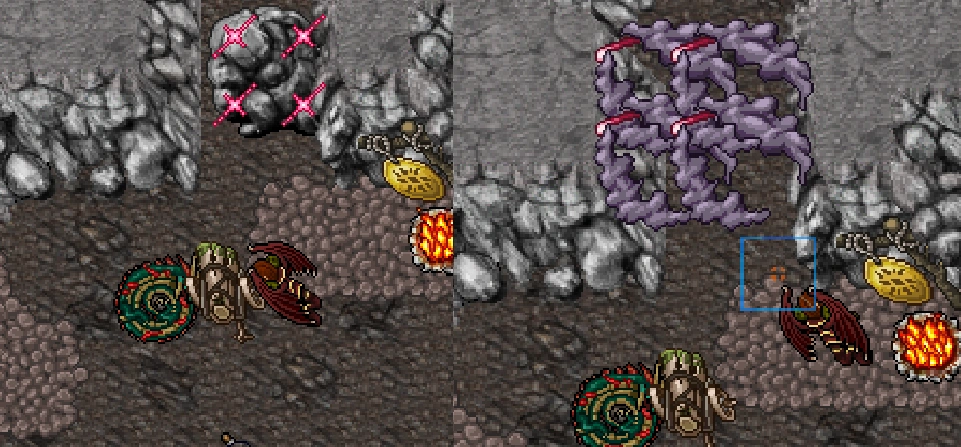
- Ustaw 4 lustra na czerwony krysztal.
- Aim all 4 mirrors at the red crystal.
- Po ustawieniu ostatniego lustra pojawiaja sie mocne wybuchy - od razu odsun druzyne.
- After the last mirror, heavy explosions trigger - move team away instantly.
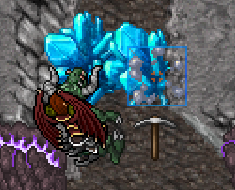
- Zniszcz niebieski krysztal uzywajac zwyklego Picka.
- Destroy the blue crystal with a regular Pick.
Stage 5
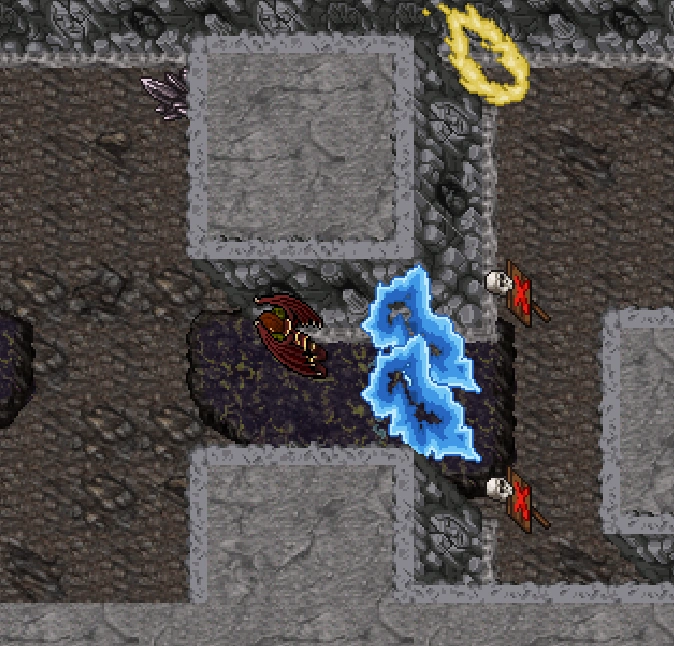
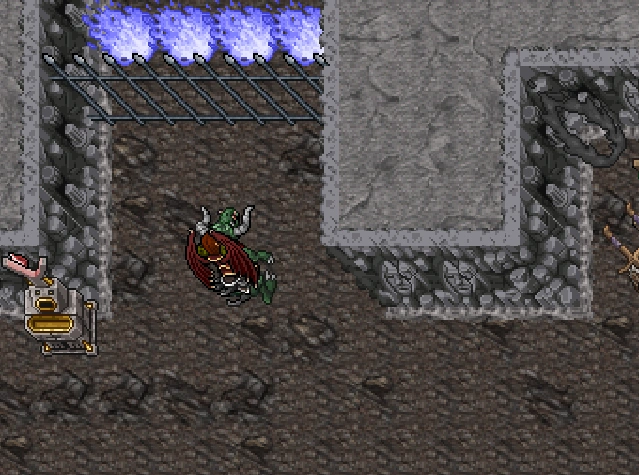
- Aby przejsc grate, wejdz w czarny teleport po prawej.
- To pass the grate, enter the black teleport on the right side.
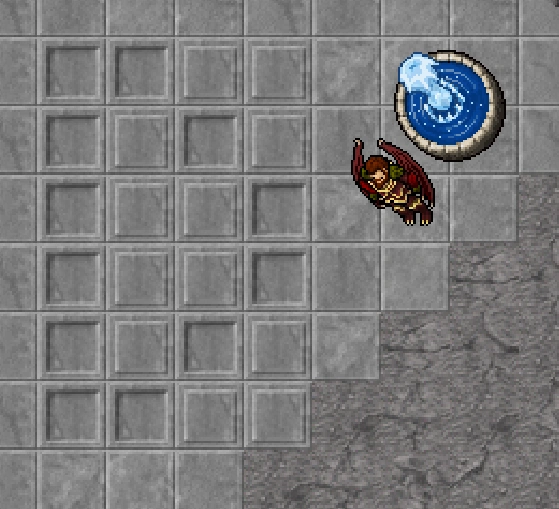
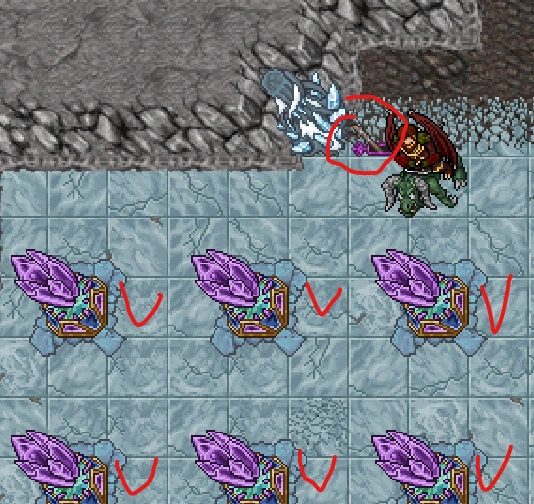
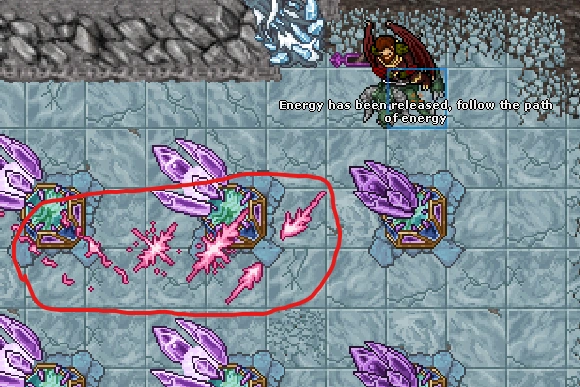
- Riddle 8 czesc 1: ustaw 6 crystalow i aktywuj dzwignie po ich naladowaniu energia.
- Riddle 8 part 1: place 6 crystals and use levers after energy charging.
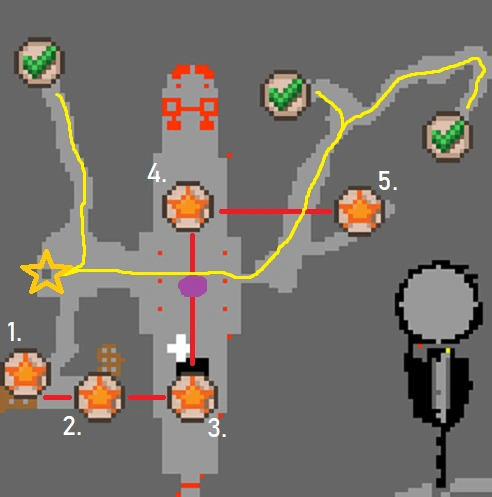
- Riddle 8 czesc 2: naladuj postac energia i zapal 3 plomienie w punktach.
- Riddle 8 part 2: charge your character and ignite 3 flames at marked points.
- Po aktywacji plomieni usuwasz magiczna bariere i otwierasz portal na final bossa.
- After all flames are active, magical barrier is removed and final boss portal opens.
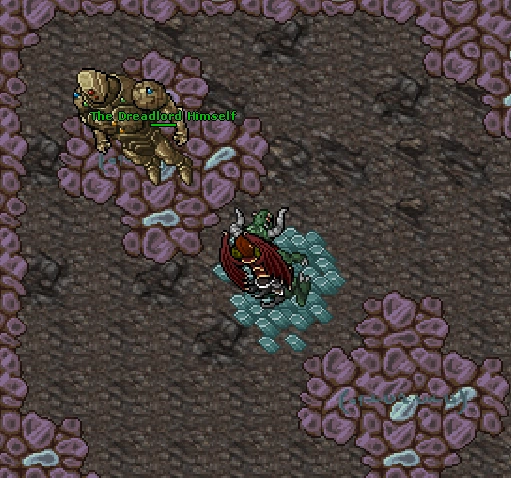
Final Boss and Reward
Po pokonaniu The Dreadlord Himself pojawia sie portal do reward room. W pomieszczeniu odbierasz nagrode wybrana na poczatku runu.
After defeating The Dreadlord Himself, a portal appears to the reward room. There you claim the reward selected at dungeon start.
Most Important Tips
- Teleporty awaryjne pojawiaja sie przy blokadach mapy - pilnuj, zeby nikt z teamu nie zostal z tylu.
- Emergency teleports appear near blocked passages - make sure nobody gets left behind.
- Do etapu armat i smokow zabierz zapas oleju. Bez oleju latwo zablokowac progress.
- Bring enough oil for cannon and dragon sections. No oil often means stalled progress.
- Przed resetem dzwigni i mechanik ustal role w party (tank, clicker zagadek, support).
- Assign party roles before puzzle sections (tank, puzzle clicker, support).
- Na Stage 4 trzymaj dystans po aktywacji ostatniego lustra - wybuchy sa bardzo bolesne.
- On Stage 4, keep distance after last mirror activation - explosions are heavy.
| IP: | daikan.pl |
| Experience: | Stages |
| Client: | 15.02 |
| Type: | PvP |
| Discord: | Join |
| Gracz | Poziom |
|---|---|
| Lvl. 3942 | |
| Lvl. 3701 | |
| Lvl. 3154 | |
| Lvl. 3066 | |
| Lvl. 3043 |
| Gracz | Exp | Poziom |
|---|---|---|
| Brak wyników | ||
| Gracz | Kills | Poziom |
|---|---|---|
| 630 | Lvl. 3701 | |
| 628 | Lvl. 3066 | |
| 578 | Lvl. 3942 | |
| 558 | Lvl. 2700 | |
| 521 | Lvl. 3154 |
| Gracz | BP | Poziom |
|---|---|---|
| 10.2K | Lvl. 3154 | |
| 4.5K | Lvl. 3942 | |
| 1.7K | Lvl. 3701 | |
| 1.3K | Lvl. 3066 | |
| 1.1K | Lvl. 1592 |
Copyright 2022-2026 by Dajkan.com.
All rights reserved.