
Adventures of Galthen Quest
Spis Tresci
Adventures of Galthen
Rozbudowany quest prowadzacy przez Bounac, Bounacean Lion, Iksupan (City of Gold) oraz Galthen Final Temple. Obejmuje lancuch NPC, cztery fragmenty Galthena, skladanie klucza Intihuatac oraz opcjonalna Galthen Arena (po Mitmah, tym samym kluczem na drzwi) z tygodniowa tablica i extra na mikstury.
A large quest chain through Bounac, the Bounacean Lion, Iksupan (City of Gold), and the Galthen Final Temple. It includes an NPC storyline, four Galthen fragments, assembling the Intihuatac key, and the optional Galthen Arena (after Mitmah, same key on the door) with a weekly board and potion extras.
Dajkan: arena, tygodniowa tablica i skalowane extra na mikstury to custom. Z huntow w Iksupan nie pada pelny Stoic Iks - Broken Iks sluzy do areny, addonow i Yasira. Etap questa widac w quest logu klienta.
Dajkan: the arena, weekly board, and scaled potion extras are custom. Full Stoic Iks gear does not drop from Iksupan hunts - Broken Iks is used for the arena, addons, and Yasir. Progress is shown in the client quest log.
Wymagania
- Start questa: brak twardego progu poziomu - rozmowa z Kesar the Younger w Bounac.
- Quest start: no hard level gate - talk to Kesar the Younger in Bounac.
- Bounac palace (glebsze przejscia): poziom 150+.
- Bounac palace (deeper access): level 150+.
- Bounacean Lion (Megasylvan Yselda): etap questa 5+ oraz poziom 800+.
- Bounacean Lion (Megasylvan Yselda): quest stage 5+ and level 800+.
- Port Hope - Iksupan: poziom 150+ na przejsciu w dzungli Tiquanda (wschod od Port Hope).
- Port Hope to Iksupan: level 150+ at the Tiquanda jungle passage east of Port Hope.
- Przygotuj sie na bossy: party, supplies, odpowiedni gear na Ahau, Atab i Mitmah Vanguard.
- Prepare for bosses: party, supplies, and gear suited for Ahau, Atab, and Mitmah Vanguard.
Trasa Bounac (NPC)
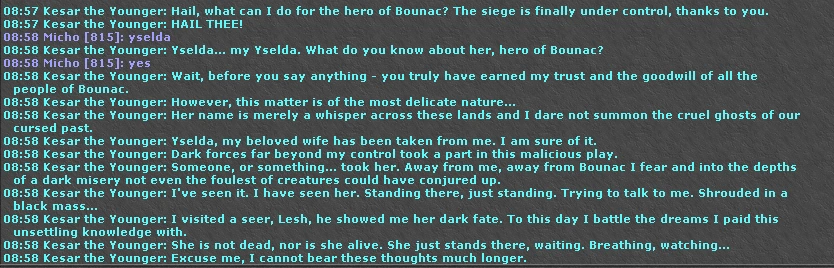
Kolejnosc rozmow - slowo kluczowe to zwykle yselda, czasem z potwierdzeniem yes.
Conversation order - the keyword is usually yselda, sometimes confirmed with yes.
Kesar the Younger
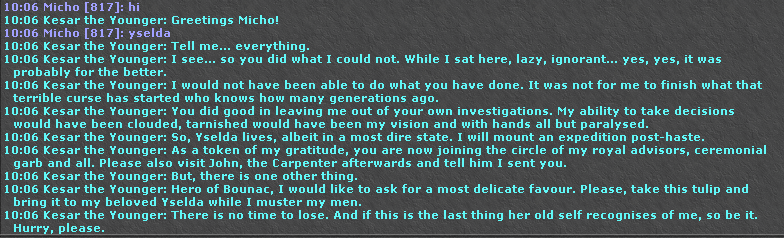
W palacu Bounac: yselda → yes.
In Bounac palace: yselda → yes.
Lesh The Seer
W Bounac: yselda - wskazowka, by isc sladem Galthena do Edron.
In Bounac: yselda - follow knight Galthen's trail to Edron.
Spectulus
W Edron Academy: yselda → yes - lore o klatwie Carnisylvan.
At Edron Academy: yselda → yes - Carnisylvan curse lore.
Innkeeper Alphonse
W Lionheart (karczma Bounac): yselda → yes (trzy kroki dialogu).
At Lionheart (Bounac inn): yselda → yes (three dialogue steps).
Kesar the Younger
Ponownie yselda - odblokowanie dostepu do Bounacean Lion.
Say yselda again - unlocks Bounacean Lion access.
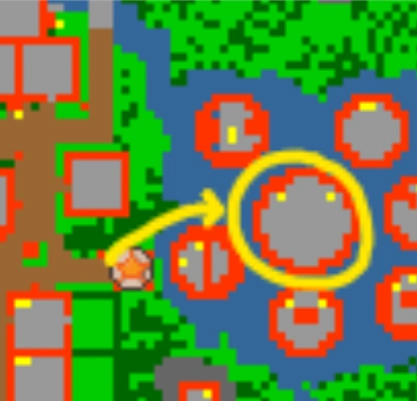
Megasylvan Yselda
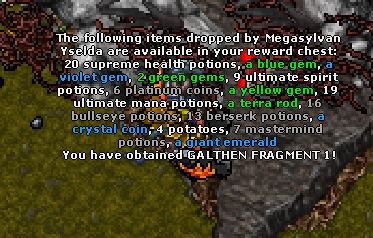
Po etapie 5 wejdz do Bounacean Lion (poziom 800+). Pokonaj Megasylvan Yselda - dostaniesz Galthen Fragment 1.
After stage 5, enter the Bounacean Lion (level 800+). Defeat Megasylvan Yselda to receive Galthen Fragment 1.
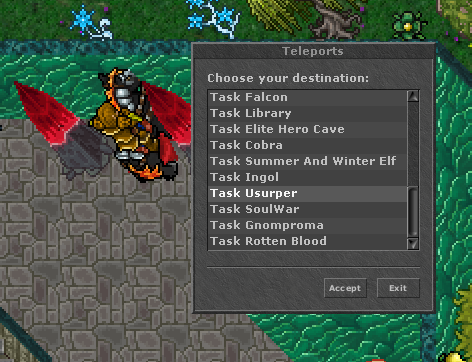
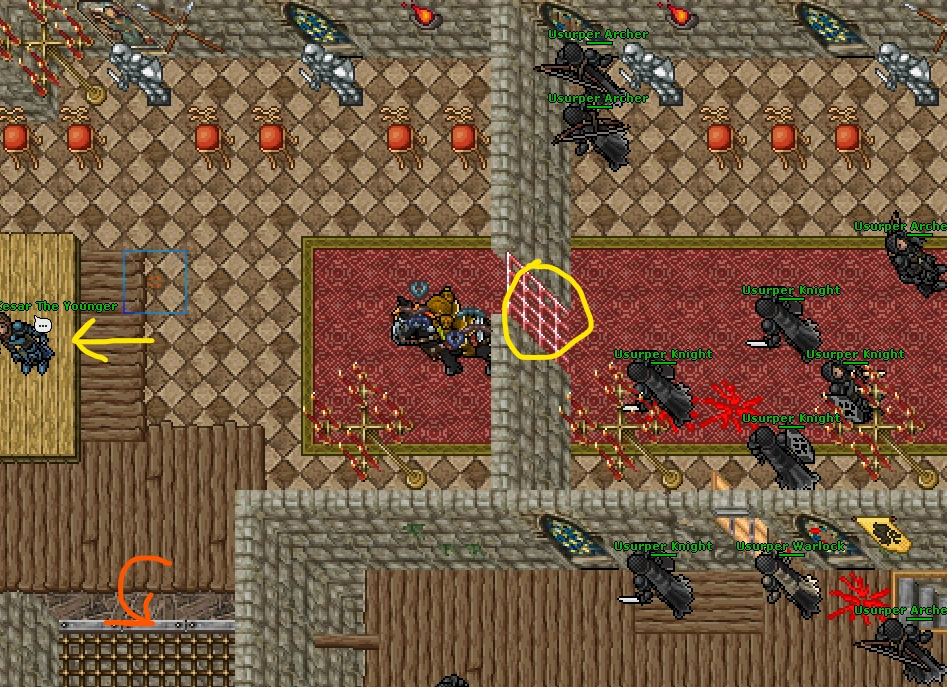
Trasa do Carnisylvan / Forest of Life: brama Bounacean Lion (800+) → pietro Crypt Warriors → schody w dol. Wejdz w mystic flame - tak samo jak przy kazdym innym teleporcie na tej trasie.
Route to Carnisylvans / Forest of Life: Bounacean Lion gate (800+) → Crypt Warriors floor → stairs down. Step into the mystic flame - the same teleport marker used everywhere else on this route.
Wroc do Kesar i powiedz yselda. Dostaniesz Royal Advisor outfit (base) oraz duze doswiadczenie. Nastepny obowiazkowy krok to Iksupan (przejscie z Port Hope, poziom 150) - hunt Ahau wsrod Iksow. Violet Tulip pada raz do reward chesta Yseldy razem z reszta lupu (addon u Johna jest opcjonalny).
Return to Kesar and say yselda. You receive the Royal Advisor outfit (base) and large XP. The next required step is Iksupan (Port Hope jungle passage, level 150) - hunt Ahau among the Iks. The Violet Tulip is a one-time guaranteed drop in Yselda's reward chest with the rest of the loot (John's addon is optional).
Tulip w komnacie Yseldy (opcjonalnie)
Tulip at Yselda's chamber (optional)
Jesli wziales tulipana z reward chesta Yseldy, uzyj go na polach w komnacie spoczynku. Nie blokuje to tej czesci questa - Iksupan jest otwarte od razu. Gdy zgubisz kwiat, powiedz Kesarowi tulip.
If you took the tulip from Yselda's reward chest, use it on the tiles in her resting chamber. This does not gate the quest - Iksupan is open immediately. If you lost the flower, say tulip to Kesar.
John (Bounac, opcjonalnie)
John (Bounac, optional)
U stolarza Johna: addon lub tulip - Royal Advisor addon 1 (po polozeniu tulipana).
At carpenter John: addon or tulip - Royal Advisor addon 1 (after placing the tulip).
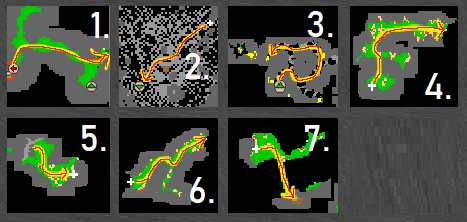
Iksupan i bossy
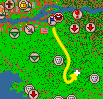
Z Port Hope idz na wschod w dzungle Tiquanda i wez przejscie do Iksupan (City of Gold). Glebiej czekaja bossy i fragmenty.
From Port Hope, go east into the Tiquanda jungle and take the passage to Iksupan (City of Gold). Deeper areas hold bosses and fragments.
| Boss | Fragment | Dodatkowe nagrody |
|---|---|---|
| Megasylvan Yselda | Fragment 1 | Dostep do dalszej czesci questa |
| Ahau | Fragment 2 | Ancient Aucar outfit (base); czesc dysku przy pierwszym killu; addon 1 jesli masz pelny Broken Iks na slocie przy zabiciu |
| Atab | Fragment 3 | Czesc dysku przy pierwszym killu; Idol of Tukh i Broken Iks w lootcie |
| Mitmah Vanguard | Fragment 4 | Ancient Aucar addon 2; moze przywolac Venomretch |
Jesli nie dostales Ancient Aucar z Ahau, mozesz uzyc Idol of Tukh (drop z Atab) jako alternatywy na base outfit. Addoner tego stroju nie sprzedaje.
If you missed Ancient Aucar from Ahau, you can use Idol of Tukh (Atab drop) as an alternative for the base outfit. Addoner does not sell this outfit.
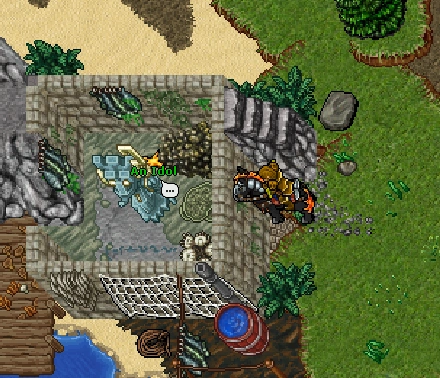
Ancient Disc i Intihuatac Key
Potrzebujesz trzech czesci dysku, aby zlozyc Intihuatac Key i pierwszy raz wejsc do Final Temple.
You need three disc parts to assemble the Intihuatac Key and enter the Final Temple the first time.
| Czesc | Zrodlo |
|---|---|
| Pierwsza czesc dysku | Codzienne szukanie po etapie 6 - jedno z trzech miejsc na mapie (aktywne miejsce rotuje co 20h dla wszystkich graczy); osobisty cooldown 20h |
| Druga czesc | Atab - gwarantowana przy pierwszym zabiciu |
| Trzecia czesc | Ahau - gwarantowana przy pierwszym zabiciu |
Skladanie: uzyj jednej czesci dysku na drugiej (wszystkie trzy w ekwipunku) → Intihuatac Key.
Assembly: use one disc part on another (all three in inventory) → Intihuatac Key.
Uzycie klucza: nie na poczatku trasy. Najpierw sa studnie, a wielki portal stoi prawie na koncu podejscia do Final Temple. Przy pierwszym wejsciu przez ten portal potrzebujesz Intihuatac Key. Zawsze wchodzisz, ale jest 10% szans, ze klucz peknie i zniknie. Po zabiciu Mitmah Vanguard ten sam portal otwierasz zwyklym uzyciem, bez klucza. Od tego momentu klucz sluzy do drzwi Galthen Arena - znowu 10% szans, ze peknie (tez zostajesz w srodku). Gdy peknie, zloz nowy z codziennych czesci dysku.
Key use: not at the start of the path. The wells come first; the large portal is near the end of the Final Temple approach. The first time through that portal you need the Intihuatac Key. You always go in, but there is a 10% chance the key cracks and is gone. After you kill Mitmah Vanguard the same portal is a plain use, no key. From then on the key opens the Galthen Arena door - again a 10% chance it cracks (you still enter). If it breaks, assemble a new one from daily disc parts.
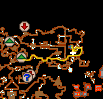
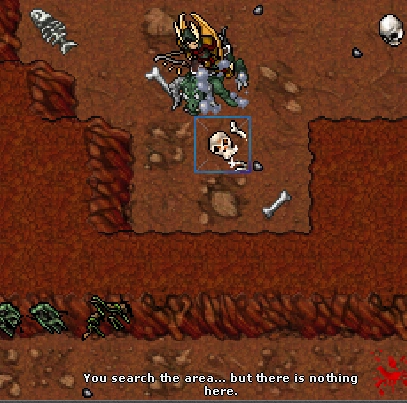
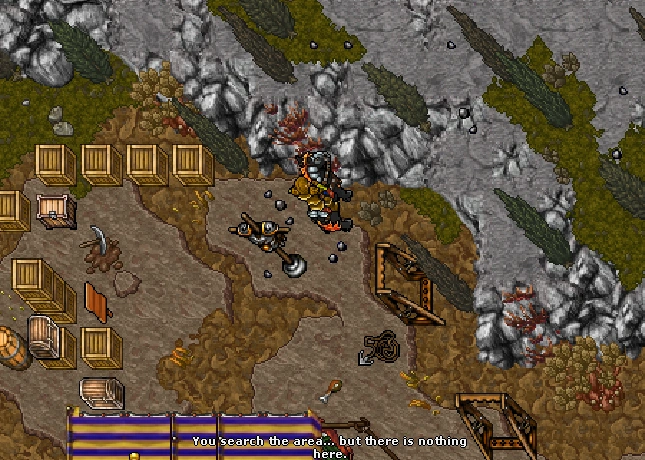
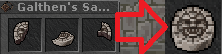
Galthen Final Temple
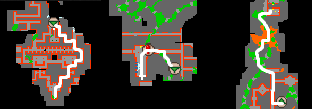
Kolejnosc jest wazna: najpierw studnie w podejsciu (bez extra itemow i bez klucza). Idziesz dalej przez teren swiatyni. Prawie na koncu stoi wielki portal - dopiero tam pierwszy raz uzywasz Intihuatac Key (moze peknac, ale i tak wchodzisz). W srodku puzzle dzwigni, potem Mitmah Vanguard. Po killu wracasz tym samym portalem, juz bez klucza.
Order matters: the wells come first on the approach (no extra items, no key). You continue through the temple grounds. Near the end is a large portal - that is the first Intihuatac Key use (it may crack, but you still go in). Inside: the lever puzzle, then Mitmah Vanguard. After the kill you return through the same portal, no key.
Podwojne studnie
Double wells
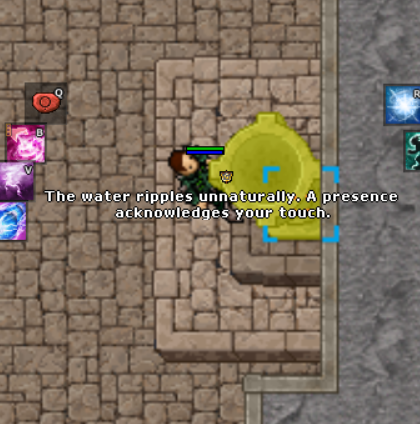
Aktywuj obie starozytne studnie na poczatku podejscia do swiatyni. Bez Jug of Gold Lye, Pitch with Paint i bez klucza - to itemy z Real Tibii, u nas ich nie trzeba. Po kliknieciu kazdej zobaczysz komunikat o wodzie - dopiero druga studnia wciaga Cie dalej. To jeszcze nie Final Temple.
Activate both ancient wells at the start of the approach. No Jug of Gold Lye, Pitch with Paint, or key - those are Real Tibia items and are not used here. Each click shows a water message - the second well pulls you through. This is not the Final Temple yet.
Wielki portal (Final Temple)
Large portal (Final Temple)
Po studniach idziesz dalej. Prawie na koncu jest wielki portal - to nie "zloty mechanizm". Przy pierwszym wejsciu uzyj Intihuatac Key (kliknij portal z kluczem w ekwipunku). Zawsze Cie wciaga, ale jest 10% szans, ze klucz peknie i zniknie. Kolejne wejscia po zabiciu Mitmaha: ten sam portal, juz bez klucza.
After the wells you keep going. Near the end is a large portal - not a "golden mechanism". The first time, use the Intihuatac Key (click the portal with the key in your backpack). You always go in, but there is a 10% chance the key cracks and is gone. Later visits after Mitmah: the same portal, no key.
Puzzle dzwigni
Lever puzzle
Rozwiaz sekwencje 12 dzwigni raz na postac. Po kliknieciu dowolnej dzwigni strzalka pokazuje kolejna. Potem wewnetrzne drzwi wpuszczaja Cie na stale - puzzle nie wraca przy kolejnych walkach z bossem.
Solve the 12-lever sequence once per character. After you click any lever, an arrow marks the next one. The inner door then lets you through permanently - you do not repeat the puzzle for later boss fights.
Mitmah Vanguard
Mitmah Vanguard
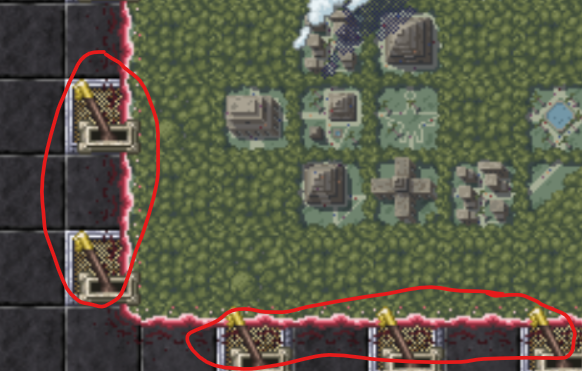
Walka to obwod dzwigni, nie tylko DPS. Cztery boczne dzwignie laduja pieczec, poludniowa dzwignia zapala jedna cewke, cykl powtarzasz az swieca sie obie, wtedy polnocna dzwignia wciaga bossa na lancuchy. Pelna instrukcja nizej.
The fight is a lever circuit, not just DPS. Four side levers charge the seal, the south lever lights one coil, you repeat until both coils glow, then the north lever pulls the boss onto the chains. Full fight guide below.
Venomretch
Po Mitmah cala grupa ma 60% szans na automatyczny teleport do ukrytej komnaty. Spawn to jeden Venomretch na full HP (stary, obnizony HP jest usuwany). Boss nie respawnuje sie po zabiciu. Skrzynia z nagroda dziala raz na ta walke - ponowne klikanie nic nie daje.
After Mitmah the whole group has a 60% chance to be teleported to the hidden chamber. Exactly one full-HP Venomretch is there (a damaged leftover is replaced). The boss does not respawn after the kill. The reward chest can be claimed once per that hunt.
Venomretch przyzywa Toxic Slime i Venom Blob. Po zabiciu - skrzynia z gemami, crystal coins i rzadkim Broken Iks (raz na sesje z teleportu po Mitmah).
Venomretch summons Toxic Slime and Venom Blob. After the kill - a chest with gems, crystal coins, and rare Broken Iks (once per Mitmah teleport session).
Walka z Mitmah Vanguard
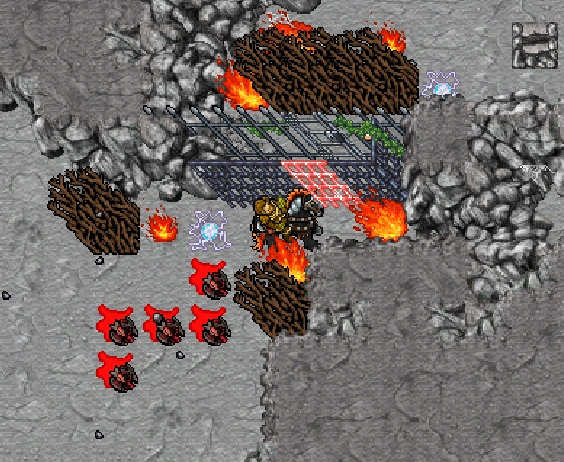
Sala bossa to obwod energii, nie sam DPS. Ciosy i czary nadal schodza mu HP, ale najwiekszy spadek daje polnocna dzwignia: sciaga Mitmaha na srodek krzyza lancuchow i obcina okolo 10% jego aktualnego HP. Ta dzwignia ruszy sie dopiero gdy po obu stronach swieca sie obie cewki. Przy pierwszym killu strzalka pokazuje kolejna dzwignie. Pozniej cykl zostaje ten sam, tylko bez strzalek.
The boss room is an energy circuit, not a DPS-only fight. Normal hits still work, but the big cut comes from the north lever: it pulls Mitmah onto the center of the chain cross and removes about 10% of his current HP. That lever does nothing until both coils beside it are lit. On the first kill an arrow marks the next lever. Later fights keep the same loop without arrows.
Pelny cykl
Full loop
4 boczne dzwignie (z naladowanymi rezystorami) → pieczec na poludniu (zapala jedna cewke) → powtorz 4 + pieczec (druga cewka) → boss w strefie lancuchow → polnocna dzwignia (teleport na srodek + 10% aktualnego HP).
4 side levers (with charged resistors) → south seal (lights one coil) → repeat 4 + seal (second coil) → boss in the chain zone → north lever (teleport to center + 10% current HP).
1. Cztery boczne dzwignie
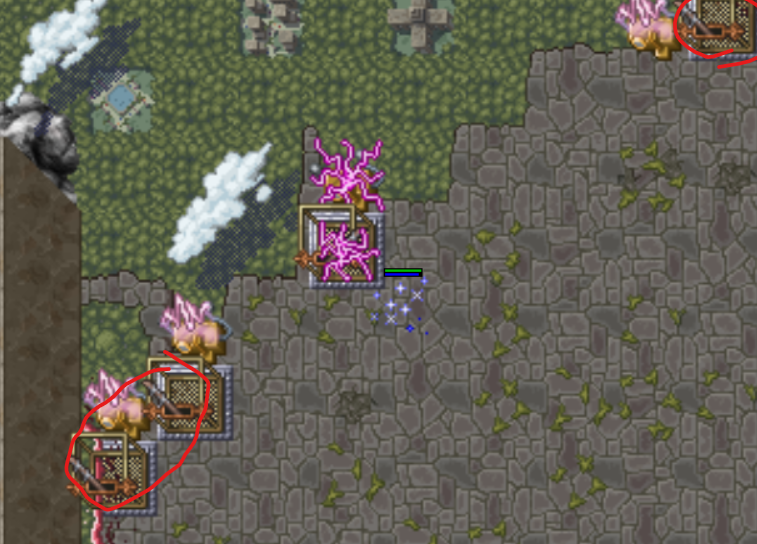
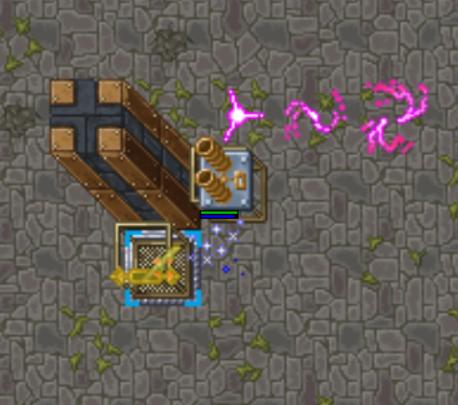
Zaczynasz od czterech dzwigni przy scianach sali. Nad kazda musi stac elektryczny rezystor z rozowym ladunkiem - bez niego dzwignia nie przyjmie klikniecia. Pociagnij wszystkie cztery. Kolejnosc nie ma znaczenia, ale kazda tylko raz na cykl. Kazde klikniecie laduje rezystor i puszcza energie do pieczeci na poludniu. Gdy cztery sa zrobione, pieczec sie odblokowuje.
Start with the four wall levers. Each one needs an electric resistor with a pink charge above it - without that the lever does not accept the click. Pull all four. Order does not matter, but each lever only once per cycle. Each pull charges the resistor and sends energy to the south seal. When all four are done, the seal unlocks.
2. Poludniowa pieczec
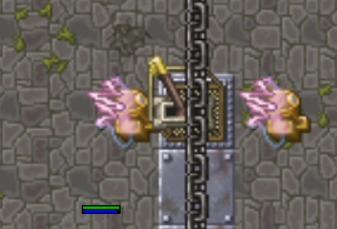
Zejdz na poludnie sali i pociagnij dzwignie pieczeci (ponizej czterech bocznych). Dziala tylko wtedy, gdy cztery rezystory juz zasilily pieczec. Z dzwigni leci promien w strone polnocnych cewek i zapala jedna cewke przy ostatniej dzwigni. Potem boczne rezystory wracaja do spoczynku - obwod trzeba zasilic od nowa.
Go to the south of the room and pull the seal lever (below the four side levers). It only works after the four resistors have charged the seal. A beam travels toward the north coils and lights one coil next to the last lever. The side resistors then reset - you have to charge the circuit again.
3. Druga cewka - powtorz cykl
Jedna cewka nie wystarczy. Ostatnia dzwignia ruszy sie dopiero gdy swieca sie obie. Wiec jeszcze raz: cztery boczne dzwignie, potem znowu pieczec na poludniu. Drugi promien zapala druga cewke. Dopiero wtedy polnocny obwod jest gotowy.
One coil is not enough. The last lever only works when both coils are lit. Do the loop again: four side levers, then the south seal. The second beam lights the other coil. Only then is the north circuit ready.
4. Ostatnia dzwignia i strefa lancuchow
Sciagnij Mitmaha na metalowe lancuchy. Nie musi stac idealnie na srodku krzyza - wystarczy, ze jest w tej strefie (na lancuchach albo obok skrzyzowania). Pociagnij polnocna dzwignie miedzy dwiema swiecacymi cewkami. Boss zostaje teleportowany na srodek krzyza i traci okolo 10% aktualnego HP. Jesli ktorejs cewki brakuje, dzwignia milczy. Jesli boss stoi poza strefa, tez nic sie nie stanie.
Bring Mitmah onto the metal chains. He does not need to stand on the exact center of the cross - he only has to be in that zone (on the chains or next to the crossing). Pull the north lever between the two lit coils. The boss is teleported to the middle of the cross and loses about 10% of current HP. If a coil is dark the lever stays silent. If the boss is outside the zone, nothing happens either.
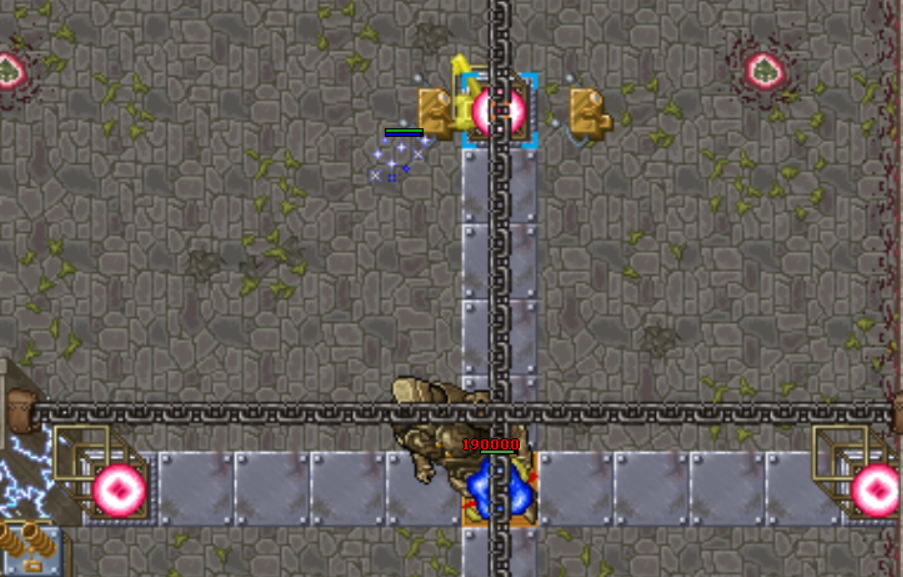
Uwaga: po kliknieciu wybuchaja cztery konce krzyza. Gracz na tych kafelkach traci okolo 80% max HP. Polnocna dzwignia stoi na jednym z tych koncow - osoba ktora klika tez dostaje wybuch. Trzymaj reszte party z dala od lancuchow i miej leczenie na klik.
Warning: the four ends of the cross explode on the click. A player on those tiles loses about 80% of max HP. The north lever sits on one of those ends - the clicker takes the blast too. Keep the rest of the party off the chains and heal through the click.
Po uderzeniu obwod resetuje sie (cewki gasna, boczne rezystory wracaja). Mozesz znowu zrobic cztery dzwignie + pieczec + obie cewki i dac kolejny strzal 10% w tej samej walce. Po zabiciu wracasz do swiatyni tym samym wielkim portalem (bez klucza). Klucz zostawiasz na drzwi areny. W wewnetrznej swiatyni jest extra skrzynia ze zlotem (8-12kk, raz na te walke).
After the hit the circuit resets (coils go dark, side resistors idle). You can run four levers + seal + both coils again for another 10% cut in the same fight. After the kill, return to the temple through the same large portal (no key). Keep the key for the arena door. The inner temple has the extra gold chest (8-12kk, once per this fight).
Galthen Arena (custom)
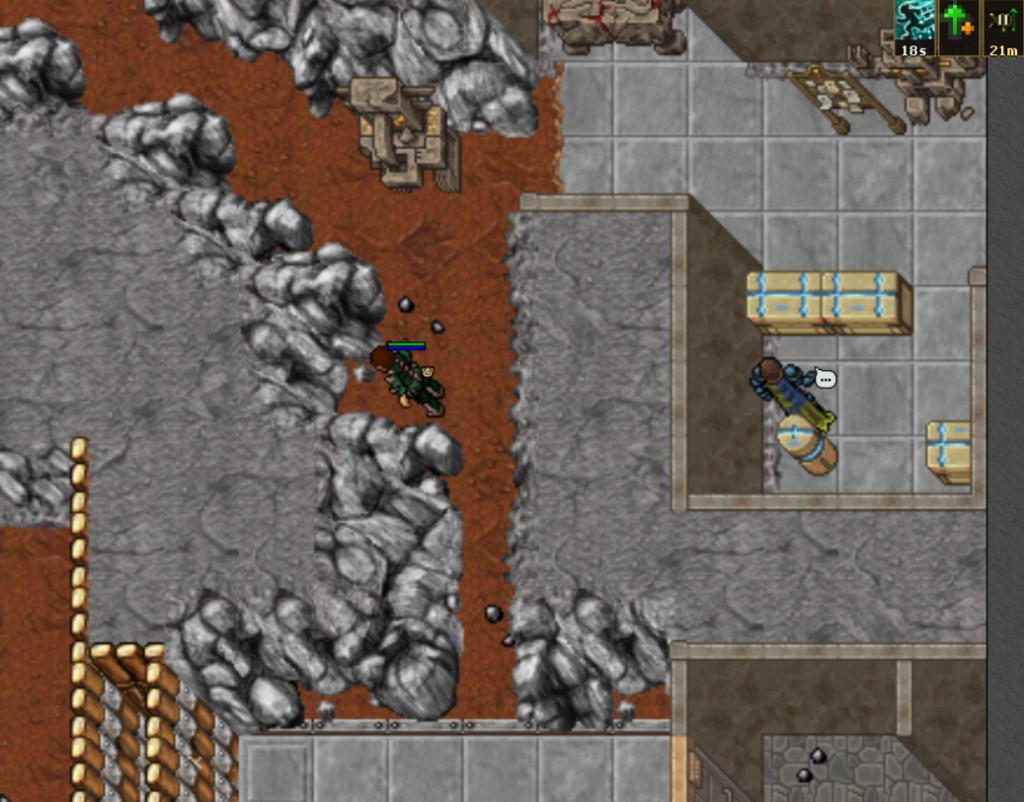
Opcjonalna arena PvE obok Final Temple. Odblokowuje sie po zabiciu Mitmah Vanguard (wystarczy tez cooldown bossa / wpis w bosstiary). Wejscie: uzyj Intihuatac Key na drzwiach areny albo kliknij drzwi z kluczem w ekwipunku (10% szans, ze klucz peknie). Wyjscie z holu: kliknij wewnetrzne drzwi - teleportuja, nie otwieraja sie i nie pokazuja komunikatu o intruzach. Po ukonczeniu 5 fal kick idzie do lobby przy polach startowych (nie przez drzwi areny).
Optional PvE arena next to the Final Temple. It unlocks after you kill Mitmah Vanguard (boss cooldown / bosstiary also counts). Entry: use the Intihuatac Key on the arena door or click the door with the key in your backpack (10% chance the key cracks). Hall exit: click the inner door - it teleports you, does not open, and does not show the sealed-intruder text. After 5 waves you are kicked to the lobby by the start tiles (not through the arena door).
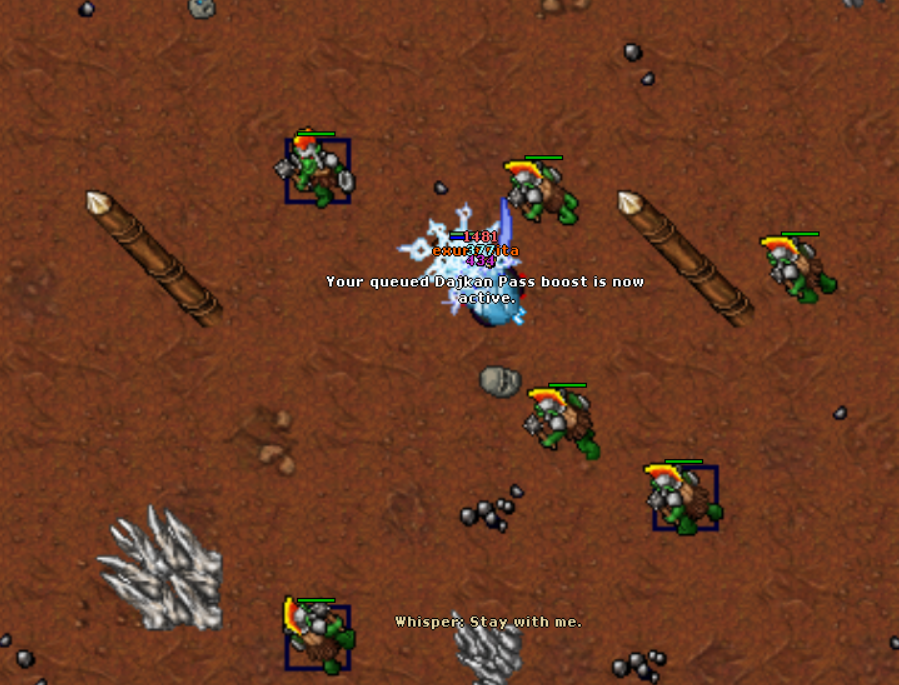
Arene mozna odpalac zawsze - takze po 5. cyklu. Stage, wynik na tablicy i extra na miksturach spadaja razem po 7 dniach od pierwszego clearu tej postaci w danym oknie, nie po rundzie i nie po rozmowie z Iksan. Po resecie extra wraca dopiero po kolejnym ukonczeniu cyklu.
You can run the arena any time - including after cycle 5. Stage, board score, and potion extras drop together 7 days after that character's first clear in the window, not after a run and not after talking to Iksan. After the reset the extra comes back only when you finish a cycle again.
- Rejestracja: Arena Master Iksan -
arena/challenge→yes. Kolejny cykl to min(best+1, 5). Po cyklu 5 zostajesz na 5 i mozesz powtarzac bez nowej rozmowy, jesli nadal jestes zapisany. - Signup: Arena Master Iksan -
arena/challenge→yes. Next cycle is min(best+1, 5). After cycle 5 you stay on 5 and can repeat without talking again if you are still signed. - Wejscie: klucz na zewnetrznych drzwiach (za Mitmahem). W srodku Arena Master Iksan, potem do 2 graczy na polach startowych; ten sam podpisany cykl u wszystkich.
- Entry: key on the outer door (after Mitmah). Inside: Arena Master Iksan, then up to 2 players on the start tiles; everyone must share the same signed cycle.
- Fale: 5 fal na cykl - 6, 12, 24, 48, 66 potworow [Cycle N] Iks Tezcat.
- Waves: 5 waves per cycle - 6, 12, 24, 48, 66 [Cycle N] Iks Tezcat monsters.
- Cykle: 5 poziomow trudnosci. Najlepszy cykl w oknie liczy sie do mikstur i tablicy. Slabszy powtorka nie obniza wyniku.
- Cycles: 5 difficulty tiers. Best cycle in the window counts for potions and the board. A weaker repeat does not lower the score.
- Mikstury: extra naklada sie automatycznie od pierwszego ukonczenia cyklu (berserk, mastermind, bullseye, transcendence). Iksan
boost/reward/statustylko pokazuje liczby i ile dni zostalo - nic nie trzeba odbierac. - Potions: extras apply automatically from the first cycle clear (berserk, mastermind, bullseye, transcendence). Iksan
boost/reward/statusonly reports numbers and days left - there is nothing to claim. - Czas extra: liczy sie 7 dni od momentu pierwszego clearu tej postaci w oknie - ten sam zegar co wynik na tablicy i stage. Powtorki areny nie przedluzaja tego czasu. Po 7 dniach extra gasnie razem z wynikiem, az znowu ukonczysz cykl - wtedy startuje nowe 7 dni.
- Extra duration: it lasts 7 days from that character's first clear in the window - the same clock as the board score and stage. Later arena runs do not extend it. After 7 days the extra drops with the score, until you finish a cycle again - that starts a new 7 days.
- Tablica: kliknij tablice w holu (kolo Iksan). Top 1 / 2 / 3 dostaja +10 / +6 / +2 extra skill na tych samych miksturach. Kazda postac spada 7 dni po swoim pierwszym clearze.
- Board: click the board in the hall (near Iksan). Top 1 / 2 / 3 gain +10 / +6 / +2 extra skill on those potions. Each character drops 7 days after their first clear.
- Cooldown: 10 min miedzy wejsciami; po pelnym cyklu cooldown spada do 0. Auto-reset areny po 30 min.
- Cooldown: 10 min between entries; a full-cycle win clears it. Arena auto-resets after 30 min.
Mikstury areny - trzy czesci
Arena potions - three parts
Na drinku schodza sie trzy osobne liczby. Tabele nizej pokazuja tylko extra - nie gotowy wynik. Extra dziala przez 7 dni od pierwszego clearu i gasnie razem z wynikiem, az znowu zrobisz arene.
The drink adds three separate numbers. The tables below show extras only - not the final result. Extra lasts 7 days from the first clear and drops with the score, until you run the arena again.
1. Extra za cykl areny (najlepszy w tym oknie)
1. Extra from arena cycle (best this window)
To jest dorzut z areny, bez bazy mikstury. Cykl 5 to +15 melee, nie +20.
This is the arena add-on, without the potion base. Cycle 5 is +15 melee, not +20.
| Mikstura | 1 | 2 | 3 | 4 | 5 |
|---|---|---|---|---|---|
| Berserk Potion | +3 melee | +6 melee | +9 melee | +12 melee | +15 melee |
| Bullseye Potion | +3 distance | +6 distance | +9 distance | +12 distance | +15 distance |
| Mastermind Potion | +2 magic | +4 magic | +7 magic | +10 magic | +12 magic |
| Transcendence Potion | +3 fist | +6 fist | +9 fist | +12 fist | +15 fist |
2. Extra za miejsce na tablicy
2. Extra from the weekly board
Dostajesz to tylko gdy jestes 1. / 2. / 3. w tym oknie. Inaczej ta czesc wynosi 0.
You get this only if you are 1st / 2nd / 3rd this window. Otherwise this part is 0.
| Miejsce | Dodatkowy skill na tych samych miksturach |
|---|---|
| Top 1 | +10 |
| Top 2 | +6 |
| Top 3 | +2 |
Jak to sie sumuje
How it adds up
Baza mikstury + extra z cyklu + extra z top 3 = to, co dostajesz na drinku.
Potion base + cycle extra + top-3 extra = what you get on the drink.
- Baza (zawsze): Berserk +5 melee / -10 shield. Bullseye +5 distance / -10 shield. Mastermind +3 magic. Transcendence +4 fist.
- Base (always): Berserk +5 melee / -10 shield. Bullseye +5 distance / -10 shield. Mastermind +3 magic. Transcendence +4 fist.
- Przyklad bez rankingu: Berserk, cykl 5 = 5 + 15 + 0 = +20 melee.
- Example, no rank: Berserk, cycle 5 = 5 + 15 + 0 = +20 melee.
- Przyklad z podium: Berserk, cykl 5 + top 1 = 5 + 15 + 10 = +30 melee.
- Example with podium: Berserk, cycle 5 + top 1 = 5 + 15 + 10 = +30 melee.
- Przyklad cykl 1: Berserk, cykl 1, bez tablicy = 5 + 3 + 0 = +8 melee.
- Cycle 1 example: Berserk, cycle 1, no board place = 5 + 3 + 0 = +8 melee.
Tarcza na berserk / bullseye zostaje -10, ranking jej nie rusza. Status: boost u Iksan.
Shield on berserk / bullseye stays -10; rank does not change it. Status: boost at Iksan.
Dzwignia ochrony (Broken Iks)
Protection lever (Broken Iks)
Przed walka poloz na kafelkach przy dzwigni zestaw Broken Iks i pociagnij dzwignie. Kazdy poprawny element daje 8% redukcji obrazen tylko na arenie (max 40% przy 5 elementach). Elementy zostaja zuzyte. To osobny bonus od extra na miksturach. Iksan: protection / lever / bonus.
Before the fight, place Broken Iks pieces on the offering tiles and pull the lever. Each correct piece grants 8% damage reduction inside the arena only (max 40% with 5 pieces). Pieces are consumed. This is separate from potion extras. Iksan: protection / lever / bonus.
Mikstury areny vs inne boosty skilla
Arena potions vs other skill boosts
Extra z areny nie sumuje sie z Jean Pierre potrawkami, daniami z cookingu (magic), hireling gourmet (melee/magic/distance) ani z +10 magic z Utani Gran Hur (Strong Haste). Na jednym slocie skilla zostaje wyzszy bonus - slabszy nie dodaje sie do potki. Predkosc z haste dziala osobno i zostaje.
The arena extra does not stack with Jean Pierre special foods, cooking magic dishes, hireling gourmet skill, or the +10 magic from Utani Gran Hur (Strong Haste). One skill slot keeps the larger bonus - the weaker one is not added on top of the potion. Haste speed is separate and still applies.
- Przyklad: berserk z areny +20 melee i veggie casserole +10 melee = zostaje +20, nie +30.
- Example: arena berserk +20 melee and veggie casserole +10 melee = you keep +20, not +30.
- Przyklad: mastermind z areny +15 magic i Strong Haste +10 magic = zostaje +15 magic, a sam haste (speed) nadal dziala.
- Example: arena mastermind +15 magic and Strong Haste +10 magic = you keep +15 magic, and haste speed still works.
- Party spelle (Enchant Party / Train Party) sa na innym slocie i nadal moga dzialac obok potki.
- Party spells (Enchant Party / Train Party) use a different slot and can still run next to the potion.
Hunt Iksupan i Broken Iks
Moby w Iksupan maja statystyki zblizone do Real Tibia. Pelny Stoic Iks nie pada z huntow - tylko z vendora.
Iksupan monsters use Real Tibia-like stats. Full Stoic Iks does not drop from hunts - vendor only.
| Potwor | Strefa | Broken Iks |
|---|---|---|
| Iks Pututu | Iksupan | Headpiece (rzadko) |
| Iks Chuka | Iksupan | Spear, headpiece (rzadko) |
| Iks Aucar | Iksupan | Sandals (rzadko) |
| Iks Yapunac | Iksupan Waterways | Brak Broken Iks |
| Mitmah Scout / Seer | Iksupan Waterways | Brak Broken Iks |
| Ahau / Atab / Mitmah / Venomretch | Bossy | Broken Iks w lootcie bossow |
Broken Iks nie craftuje sie w Stoic Iks na tym serwerze.
Broken Iks cannot be crafted into Stoic Iks on this server.
Nagrody
Royal Advisor
Base od Kesar po Yseldzie; addon 1 od Johna po tulipanie z reward chesta Yseldy.
Base from Kesar after Yselda; addon 1 from John after the tulip from Yselda's reward chest.
Ancient Aucar
Base z Ahau (lub Idol of Tukh); addon 1 przy pelnym Broken Iks na Ahau; addon 2 z Mitmah Vanguard.
Base from Ahau (or Idol of Tukh); addon 1 with full Broken Iks on Ahau; addon 2 from Mitmah Vanguard.
Galthen Arena
Galthen Arena
Tygodniowa tablica + extra na mikstury od najlepszego cyklu (auto, 7 dni od pierwszego clearu). Top 3: +10 / +6 / +2. Extra gasnie razem z wynikiem, az znowu ukonczysz cykl. Arena zawsze otwarta.
Weekly board + potion extras from your best cycle (automatic, 7 days from the first clear). Top 3: +10 / +6 / +2. Extra drops with the score until you finish a cycle again. Arena always open.
Final Temple / Venomretch
Final Temple / Venomretch
Gemy, crystal coins, gold ingots, rzadki Broken Iks ze skrzyni Venomretch (raz na hunt). Po Mitmah: extra gold 8-12kk (jak Podzilla) ze skrzyni w wewnetrznej swiatyni, raz na walke.
Gems, crystal coins, gold ingots, rare Broken Iks from the Venomretch chest (once per hunt). After Mitmah: extra 8-12kk gold (same roll as Podzilla) from the inner-temple chest, once per fight.
Wskazowki
Puzzle dzwigni
Lever puzzle
W komnacie z 12 dzwigniami kliknij dowolna - strzalka pokaze kolejna. Raz na postac. W walce z Mitmahem pelna instrukcja jest wyzej: 4 boczne + pieczec (jedna cewka), powtorz cykl, potem boss w strefie lancuchow i polnocna dzwignia. Strzalki tylko przy pierwszym killu.
In the 12-lever room, click any lever - an arrow marks the next one. Once per character. For Mitmah, the full fight loop is above: 4 side levers + seal (one coil), repeat, then boss in the chain zone and the north lever. Arrows are first kill only.
Kolejnosc
Order
Najpierw lancuch Bounac i Yselda, potem od razu Iksupan (Ahau, Atab) - tulipan u Johna jest opcjonalny. Dalej studnie na poczatku podejscia, codzienny dysk i klucz, wielki portal (moze peknac), dzwignie i Mitmah. Arena dopiero po Mitmah - ten sam klucz na drzwi areny. Tablica i extra na mikstury sa tygodniowe.
Complete the Bounac chain and Yselda, then go straight to Iksupan (Ahau, Atab) - the tulip at John is optional. Then the wells at the start of the approach, daily disc and key, the large portal (it may crack), levers, and Mitmah. The arena opens only after Mitmah - same key on the arena door. Board and potion extras are weekly.
Galthen's Tree
Galthen's Tree
Raz na 30 dni mozesz zdobyc Galthen's Satchel i teleport do brzegow Edron.
Once every 30 days you can loot Galthen's Satchel and teleport to Edron shores.
Broken Iks
Broken Iks
Zbieraj na arena lever, addon Ancient Aucar i handel u Yasira - low-tier Iksupan to powolne farmienie, bossy daja wiecej.
Collect for the arena lever, Ancient Aucar addon, and Yasir - low-tier Iksupan is slow farming; bosses drop more.
Addony
Addons
Base, addon 1 (pelny Broken Iks na Ahau) i addon 2 (Mitmah) sa tylko z questa. Addoner tego stroju nie sprzedaje.
Base, addon 1 (full Broken Iks on Ahau), and addon 2 (Mitmah) are quest-only. Addoner does not sell this outfit.
| IP: | daikan.pl |
| Doświadczenie: | Progi |
| Klient: | 15.24 |
| Silnik: | Dajkan Quantum Horizon 4.4.0 |
| Typ: | No-PvP |
| Discord: | Dołącz |
Brak wynikow